How to Tape a Hockey Stick: Blade, Grip and Knob Done Right
How to Tape a Hockey Stick: Blade, Grip and Knob Done Right
Everyone tapes their stick. Hardly anyone was ever shown how. Most players do it the way their teammate did it in the locker room – and he just copied someone else too.
You can see the result on every bench: tape hanging in shreds after two practices, knobs the size of a tennis ball and blades that pick up so much snow the puck floats on them. Yet a good tape job takes five minutes. Here's how.
Why tape at all?
Tape on the blade has three jobs:
- Puck control: Cloth tape is rougher than carbon. The puck stays on the blade a little longer when you receive and carry it instead of bouncing off.
- Feel: A thin layer of cloth softens the contact. You feel the puck more gently – but still clearly enough.
- Protection: Tape absorbs part of the wear the blade would otherwise take: ice, boards, skates, blocks.
On the grip it's about something else: hold for your top hand and a knob so the stick doesn't slip out of your glove and you can pick it up off the ice.
What you need
| Material | What for |
|---|---|
| Cloth tape, about 1 inch (2.5 cm) wide | Blade and grip – the classic hockey tape |
| Stick wax | Rub over the blade tape: less snow, longer life |
| Grip tape, optional | Padded, tackier grip instead of cloth tape |
| Scissors, optional | For clean ends on the blade |
What you don't need: shin pad tape. That thin, stretchy tape is made for socks and pads and won't survive two shots on a blade.
Taping the blade – step by step
- Make the blade clean and dry. Remove all old tape and rub off any residue. On a wet or dirty surface, new tape comes loose quickly.
- Choose your starting point. Start at the heel or at the toe – more on that below. The tape starts at the bottom edge.
- Wrap tight and even. Each pass overlaps the previous one by about half. Too little overlap leaves gaps, too much makes the blade thick and dead.
- Smooth out wrinkles. Press each pass flat with your thumb. Wrinkles are where tape tears first.
- Finish cleanly. Tear or cut the tape at the end and press it down firmly. If you like, trim the excess tape along the bottom edge.
- Wax it. Rub the wax over both sides like a crayon. It fills the fibers, keeps moisture and snow out and makes the tape last much longer.
Heel to toe or toe to heel?
The eternal locker room debate. The honest answer: it's personal preference. There's no measurable performance difference.
Most players tape from heel to toe (heel-to-toe). The overlapping edges then face the heel – some players say this makes the puck roll across the blade a bit more controlled when shooting. Players who tape from toe to heel (toe-to-heel) often swear by cleaner pass reception. Try both and stick with what feels right.
How much of the blade should be taped?


Full blade – the standard
From just past the heel to just before the toe, usually leaving about an inch at both ends. Maximum control and maximum protection. If you're unsure: go with this.
Center only – more feel, less weight
One strip where the puck sits most often. Less tape means more direct puck feel and slightly less weight at the front of the blade.
Toe emphasis – for players who work off the toe
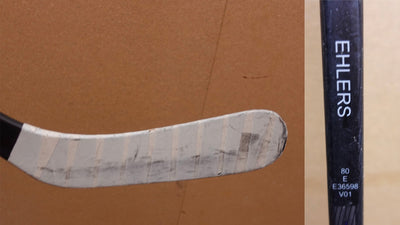
If you do a lot with the toe – toe drags, digging pucks out of the corners – extend the tape further forward. That's exactly where it wears through fastest. On Nikolaj Ehlers' game-used stick, the toe is the most worn spot.
Minimal – the pro trick from roller hockey
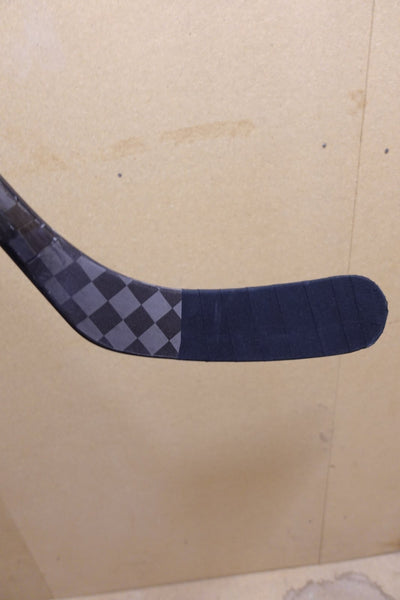
Andres Ambühl doesn't tape his blade all the way: a single black strip along the bottom edge, and a white wrap at the toe. Two zones, two functions, minimal material. It's not for everyone, but it shows that "more tape" doesn't automatically mean "better".

Black or white?
The classic hockey myth: black tape supposedly hides the puck from the goalie. In practice, a goalie reads the shot from the shooter's body and stick, not from the tape color. There's no proven advantage.
There is one practical difference, though: on white tape you see puck marks and wear right away, on black tape hardly at all. Pick the color you like – and the one that matches your stick.
Taping the grip and knob
- Build the knob: Wrap several layers on top of each other at the end of the shaft until a bump forms. It should give you hold, not spread your hand. A compact knob is plenty.
- Wrap the grip: From the knob downward, with the same half overlap as on the blade. As a rule of thumb, about as long as your gloved hand grips.
- Spiral – optional: Some players twist the tape into a cord first and wrap it as a spiral under the last layer. This creates ridges you can feel. Whether it really grips better or is pure habit, pros have argued about for decades.
- Secure the ends: Press the last piece down firmly so nothing unravels.
Keep the grip slim. A thick knob looks sturdy, but it limits wrist mobility – and with it your stickhandling.

How different this looks even among pros is shown by the sticks from our Spec Check series: Zegras with yellow cloth tape and a compact knob, Ehlers with charcoal tape and no built-up knob at all. There's no rule – only habit.
Tape and grip coating
If your stick already has a grip coating, you don't necessarily need tape on the shaft – a knob still makes sense. Many players combine both: grip for the whole shaft, tape only at the knob.
The difference: grip is permanent, tape is a wear part. In return, you can change tape any time. If you tape your whole shaft anyway, you can also choose "No Grip" on a custom stick.
When should you retape?
- The tape is torn or peeling at the edges.
- It has gone slick and the puck bounces off again.
- It collects snow even though you waxed it.
- It's soaked and won't dry anymore – that makes the blade heavier.
If you're on the ice several times a week, you'll often retape the blade after just a few sessions. Important: always remove the old tape completely, never wrap new tape over old.
The 5 most common mistakes
- Wrapped too loosely: The tape wrinkles and comes loose quickly.
- Too little overlap: Gaps form where the tape rolls up.
- New tape over old: The blade gets thick, heavy and dead.
- No wax: The tape soaks up water and lasts only half as long.
- Huge knob: Looks solid, but slows down your wrist.
Frequently asked questions
Do I even need to tape a carbon stick?
It's not mandatory. Almost all players do it anyway – for puck control and because tape absorbs some of the wear on the blade.
How much tape do I need per blade?
A regular roll of cloth tape is enough for several tape jobs. Exactly how many depends on whether you tape the full blade and how much you overlap. If you retape often, a multipack saves money.
Does tape on the back of the blade make sense?
Yes, the tape wraps around the whole blade anyway. That way it protects the forehand and backhand side equally.
Cloth tape or grip tape on the knob?
Cloth tape is thinner and cheaper, grip tape is padded and tackier. Both work. If your gloves get wet or you want more hold, go for grip tape.
Quick summary
Clean the blade, wrap tight with half overlap, smooth out wrinkles, wax. Direction is personal preference, and so is color. On the grip: slim knob, clean finish. And when the tape is slick or torn: off with it and start fresh.
👉 Configure your SOYUZ stick now – with or without grip, just the way you want to tape it.
Further guides
This article is part of our big hockey stick guide. Related: grip or no grip, cutting or extending your stick, hockey stick balance and Andres Ambühl's unique tape job.

 SOYUZ HIT GRIT
 SOYUZ AURORA
 SOYUZ ARCANE